Introduction
This article shows how to use Typescript in SharePoint 2013 while creating SharePoint Hosted app using Visual Studio 2015/2013.
Prerequisite:
- Learn Typescript. To know more about TypeScript - Click Here
- Create a SharePoint Hosted App project in Visual Studio. I have given project name as "TypeScriptApp"

Let's Start
Let's complete this task in following steps:-
- Right click on Project name "TypeScriptApp". Select "Unload project" option.

- Edit project file(TypescriptApp.csproj).

- Mention following MSBuild properties in project file(TypeScriptApp.csproj) as shown below:
<PropertyGroupCondition="'$(Configuration)' == 'Debug'"> <TypeScriptRemoveComments>false</TypeScriptRemoveComments> <TypeScriptSourceMap>true</TypeScriptSourceMap> </PropertyGroup> <PropertyGroupCondition="'$(Configuration)' == 'Release'"> <TypeScriptRemoveComments>true</TypeScriptRemoveComments> <TypeScriptSourceMap>false</TypeScriptSourceMap> </PropertyGroup> <ImportProject="$(MSBuildExtensionsPath32)\Microsoft\VisualStudio\v$(VisualStudioVersion)\TypeScript\Microsoft.TypeScript.targets"Condition="Exists('$(MSBuildExtensionsPath32)\Microsoft\VisualStudio\v$(VisualStudioVersion)\TypeScript\Microsoft.TypeScript.targets')" />
- For more details on MSBuild properties and Compiler Options - Click Here
- Close the .csproj file. Right click on Project name. Select "Reload project" option.

- Right click on project Name and check properties of it. You will get to see TypeScript Build option with following configuration.

- Create html table in Default.aspx to bind SharePoint "Sales" List data using Typescript and JSOM.

- Install following typings from Nuget package Manager :-
- jquery.TypeScript.DefinitelyTyped
- sharepoint.TypeScript.DefinitelyTyped
- microsoft-ajax.TypeScript.DefinitelyTyped

- Set the Deployment Type property of all the typescript file as "No Deployment".
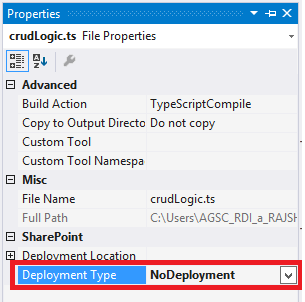
- Add a new TypeScript File.I have created in script folder named it as "crudLogic.ts".

- Set the Deployment Type property of "crudLogic.ts" file as "No Deployment".
- Drag and Drop reference of "SharePoint.d.ts" and "jquery.d.ts" on crudlogic.ts file.
- Create a Class, name it as BasicOperations in crudlogic.ts file. Mention following properties:-
classBasicOperations{//Define properties with respect BasicOperations Class_currentContext:SP.ClientContext; _hostContext:SP.AppContextSite; _web:SP.Web; _colList:SP.ListCollection; _list:SP.List; _listItems:SP.ListItemCollection; query:SP.CamlQuery;constructor() {lethostweburl = decodeURIComponent(this.getQueryStringParameter("SPHostUrl"));this._currentContext =SP.ClientContext.get_current();this._hostContext =newSP.AppContextSite(this._currentContext, hostweburl);letappweburl = decodeURIComponent(this.getQueryStringParameter("SPAppWebUrl"));this._web =this._hostContext.get_web(); } }
- In the constructor of class get the Query String parameter value of SPHostUrl and SPAppWebUrl.
privategetQueryStringParameter(urlParameterKey:string) {varparams = document.URL.split('?')[1].split('&');varstrParams = '';for(vari = 0; i < params.length; i = i + 1) {varsingleParam = params[i].split('=');if(singleParam[0] == urlParameterKey)returndecodeURIComponent(singleParam[1]); } }
- Create a interface ICrudOperation. Define a method GetAllItems. This interface will be implemented in BasicOperations Class
interfaceICrudOperation{ GetAllItems():void; }
- Create a Logger interface. Define a method logError. This interface will be implemented in BasicOperations Class.
interfaceILogger{ logError(sender:any, e:SP.ClientRequestFailedEventArgs):void; }
- Implement both interface ICrudOperation and Ilogger in BasicOperations class using "implement' keyword.
classBasicOperationsimplementsICrudOperation,ILogger{ }
- Implement GetAllItems and LogError method in BasicOperations class using JSOM.
GetAllItems():void{this._list =this._web.get_lists().getByTitle("Sales");this.query =newSP.CamlQuery();this.query.set_viewXml('<View><RowLimit></RowLimit>12</View>');this._listItems =this._list.getItems(this.query);this._currentContext.load(this._list);this._currentContext.load(this._listItems);this._currentContext.executeQueryAsync(() =>this.OnSuccess(), (sender:any, args:SP.ClientRequestFailedEventArgs) =>this.logError(this, args)); }privateOnSuccess() {varlistItemEnumerator =this._listItems.getEnumerator();while(listItemEnumerator.moveNext()) {varcurrentItem = listItemEnumerator.get_current(); $(".SalesTable").append("<tr>"+"<td>"+"<b>"+ currentItem.get_item('Month') +"</b>"+"</td>"+"<td>"+"<b>"+ currentItem.get_item('Totalsales') +"</b>"+"</td>"+"</tr>"); } } logError(sender, args) { $(".message").html("Request Failed: " + args.get_message()); }
- Use ExecuteOrDelayUntilScriptLoaded method to call a pageLoad function after sp.js loads in the browser
- In the pageLoad function create a instance of BasicOperations Class and call GetAlItems() function.
'use strict'; ExecuteOrDelayUntilScriptLoaded(pageload, "sp.js");functionpageload() {letfoo:BasicOperations=newBasicOperations(); foo.GetAllItems(); }
- Save 'crudLogic.ts' file. Click on show all files icon from Solution Explorer. Transcript compiler will create crudLogic.js' (javaScript) and 'crudLogic.js.map' file in script folder. Include crudLogic.js in the project.

- Set the Deployment Type property of crudLogic.js file to ElementFile.
- Remove all the typescript file from the Elements.xml file(present in Scripts folder) and make sure crudLogic.js file is included in Script Module.

- Include script link for crudLogic.js in Default.aspx page.

- Deploy SharePoint Hosted app. You will get to see expected result on "Default.aspx" page

- It's Done. Hurray!!!


